Ensure your Deye inverter meets the following conditions:
- Rated power ≤ 2000 W
- Inverter firmware version ≥ V2.4.0
- WiFi module firmware version is unencrypted
How can I confirm above information? View detailed steps >
Install Home Assistant
Please visit: https://www.home-assistant.io/installation/
Onboard with Home Assistant
Please visit: https://www.home-assistant.io/getting-started/onboarding/
Install Home Assistant Community Store (HACS) plugin
Please visit: https://hacs.xyz/docs/use/
Check device network information
Make sure that the Deye inverter is already set up and connected to the same local network as Home Assistant (HA).
Integration steps
To make the integration process more convenient, we recommend using a PC to complete the integration. After the integration, you may view any device information via either your mobile device or PC.
Step-1 | Access the Home Assistant web portal.
Open your computer browser and visit http://homeassistant.local:8123 to access the Home Assistant web portal.
Step-2 | Install the Solarman custom plugin via HACS
Please visit: Solarman custom plugin installation process
Step-3 | Integrate your Deye inverter into Home Assistant
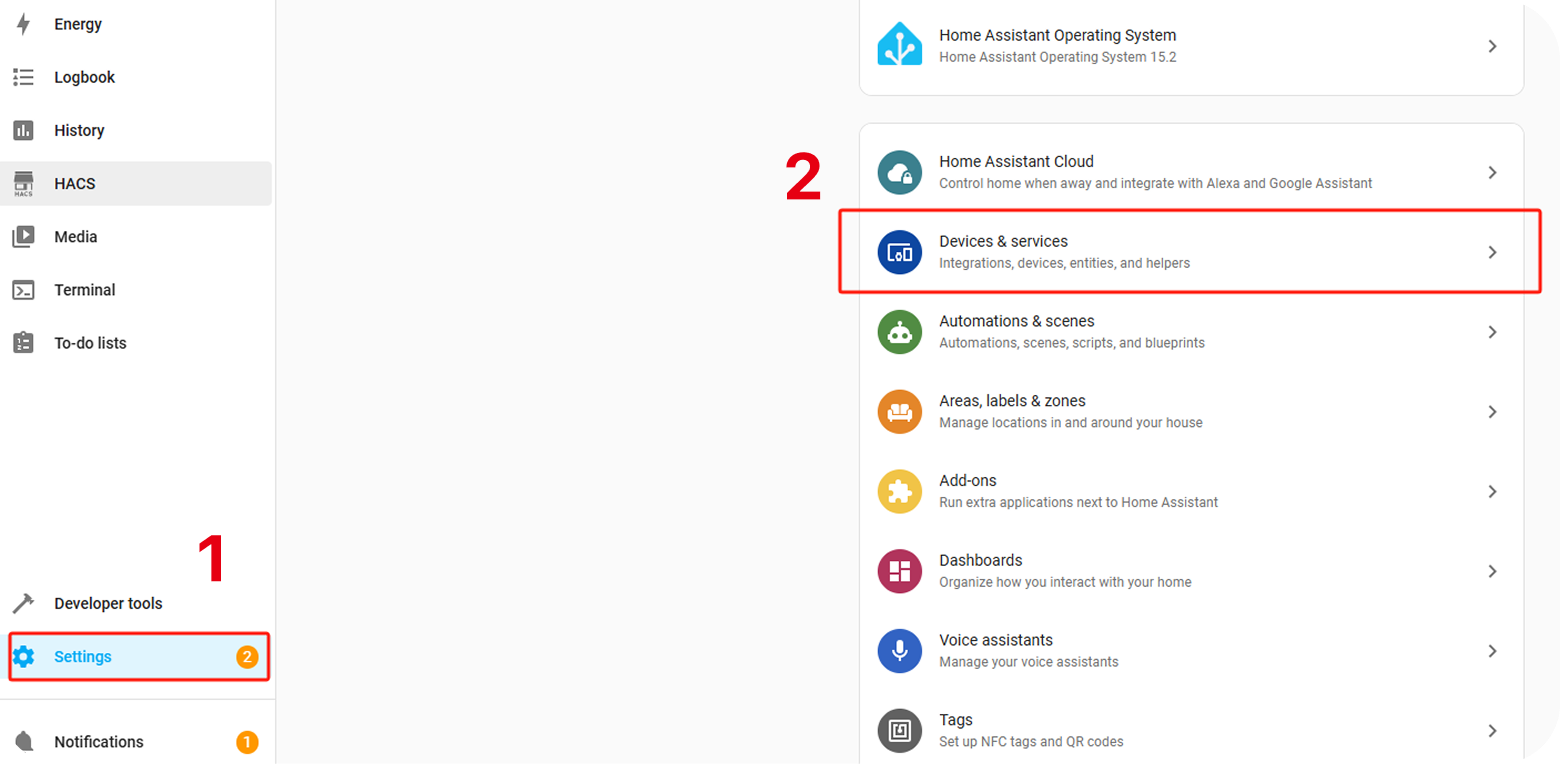
1. As shown in the image: Select "Settings" on the left side, then click on "Devices & services".
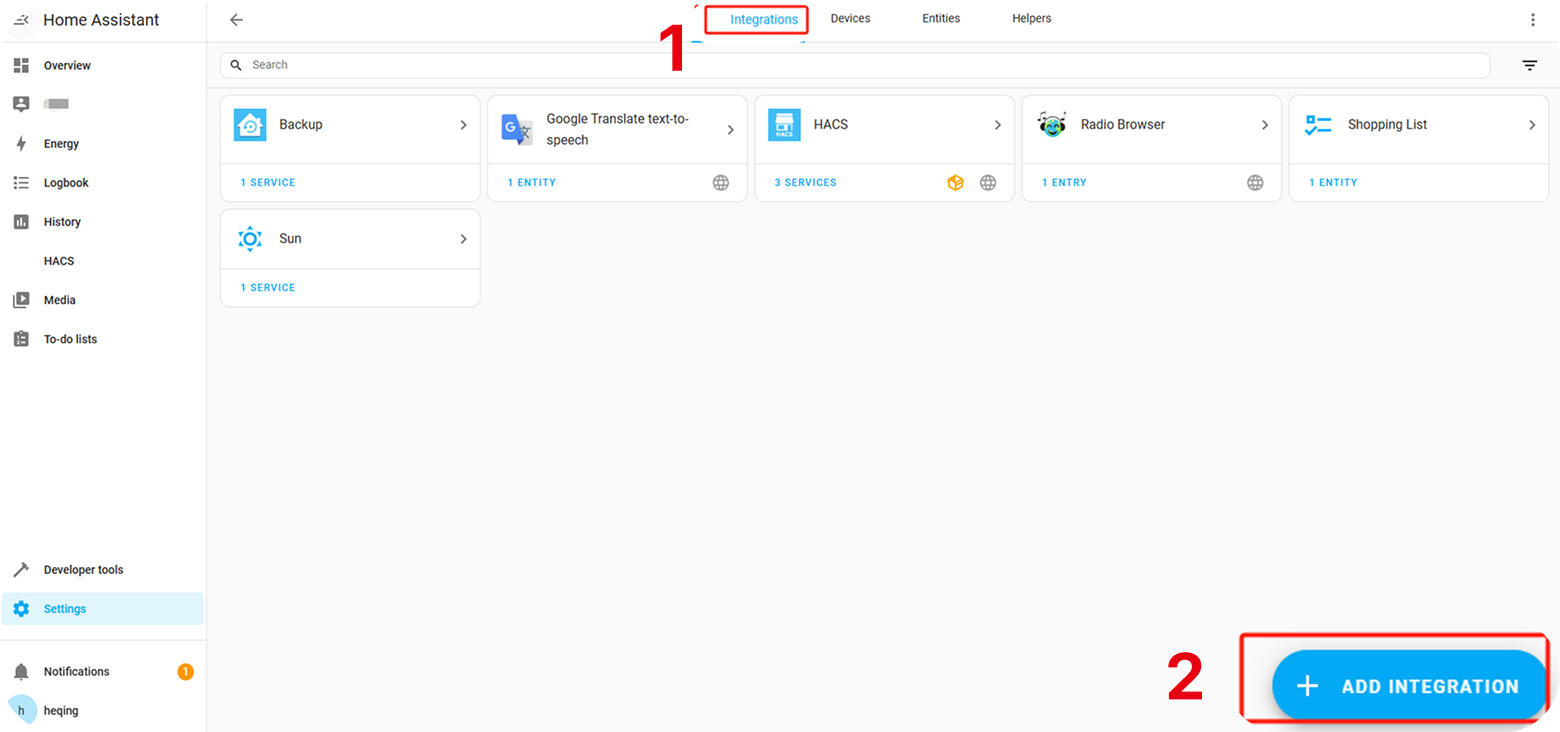
2. As shown in the image, select "Integrations" at the top, then click on "ADD INTEGRATION".
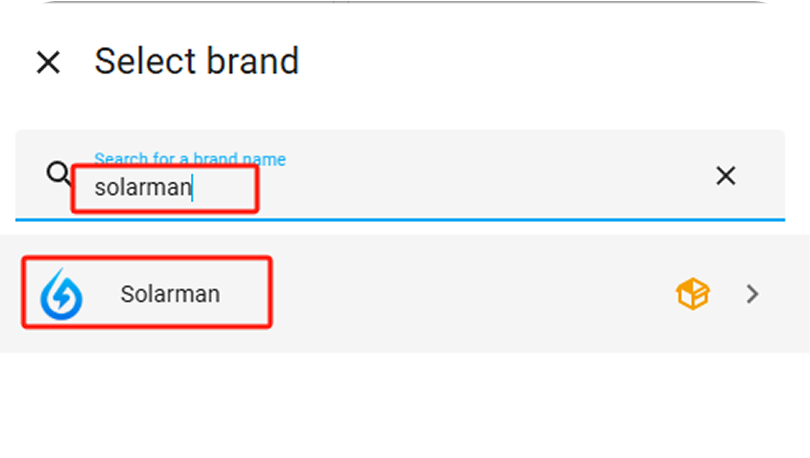
3. Enter "Solarman" in the search box and click on the "Solarman" card.
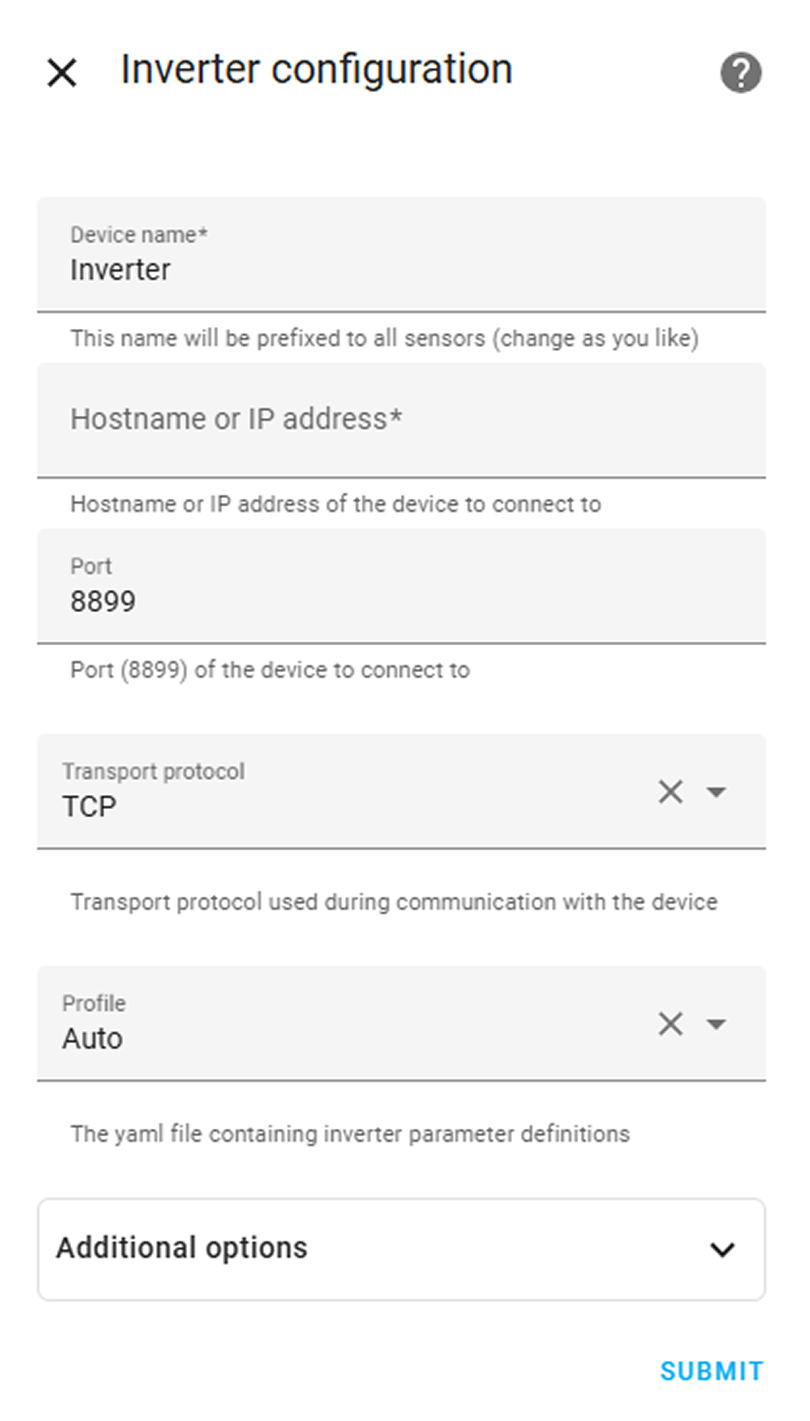
4. Fill in the required information below and click on "SUBMIT" after completing the form.
- Device name: customize your device name.
- Hostname or IP address: enter the Deye IP address: Device IP Address Acquisition Process
- Port: 8899
- Transport protocol: TCP
- Profile: Auto
- Additional options: keep default settings
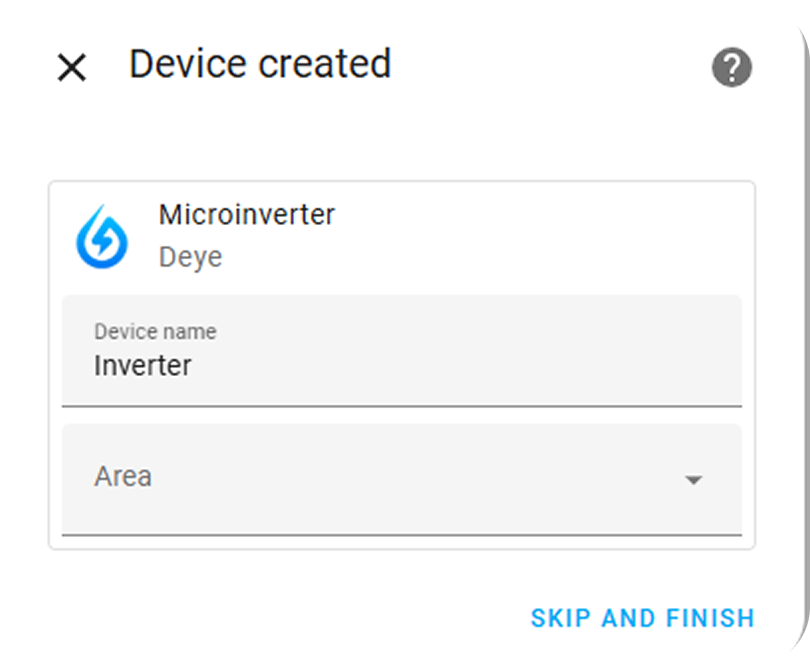
5. Click on "SKIP AND FINISH" in the pop-up window and complete the integration.
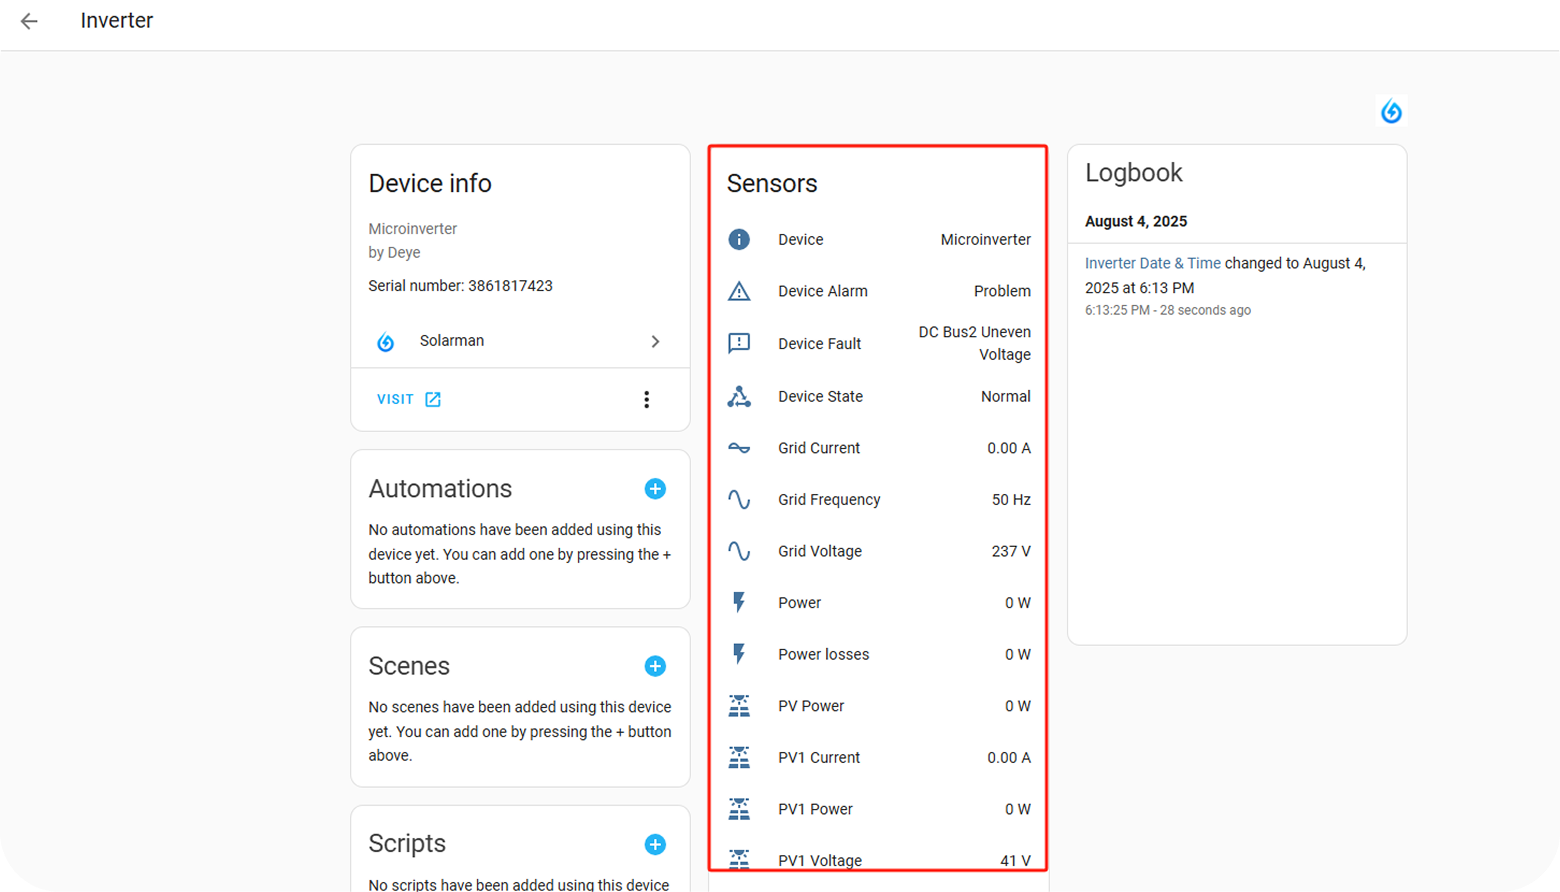
6. The highlighted area in the screenshot shows the relevant data information.